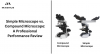
Step-by-Step Guide for Using MLX Plus Microscope in School Labs
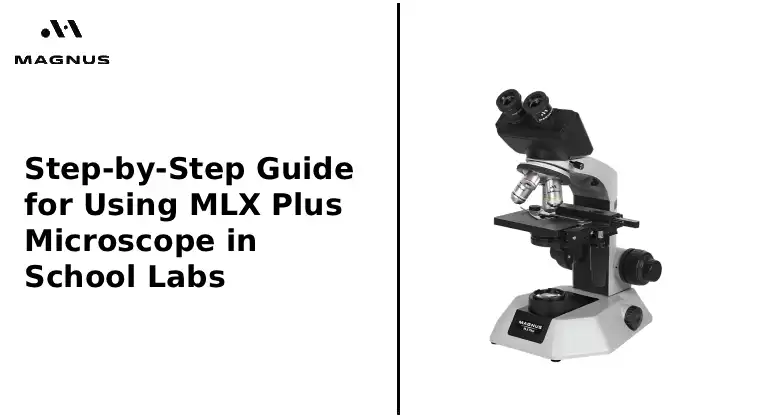
As the MLX Plus Microscope is simple to use and constructed with premium optics, it is frequently used in classrooms and basic labs. The MLX Plus educational microscope teaches students how to operate scientific instruments securely. Also, it helps them see cells, tissues, and microbes. To help both teachers and students work confidently with the MLX Plus Microscope during lab sessions, this step-by-step guide explains everything you need to know.
Step 1: Getting the Microscope Ready for Use
Before you observe anything, it is mandatory to position the Student microscope MLX Plus. You should choose a sturdy table that can accommodate your microscope and your notebooks. You need to confirm that the space is adequate to operate the controls effortlessly.
It is highly recommended that you ensure there are no obstructions in the ventilation apertures at the bottom of the microscope. During extended use, these openings help prevent overheating. When they are clear, the microscope will operate at its best with complete safety. The MLX Plus microscope features a lot to offer students, so make sure it's ready to use accordingly.
The power cord must be firmly attached to the microscope. The microscope is powered by the power line that comes with the gadget, so make sure to use it. Next, attach the other end to a safe electrical outlet. You don't have to switch on the lamp right now because it will be turned on later.
Step 2: Setting Up Objective Lenses and Eyepieces
You will find detachable eyepieces in the lot of Affordable student microscopes. You should insert them before using. From the observation tube, you should remove the eyepiece cap. This is how you should start. With your hands, you should slip the eyepiece lens into the tube. Give complete attention to whether it fits perfectly.
You should rotate the nosepiece once the 10X lens clicks into place above the stage. This lens will be perfect for kicking off your observations. The reason is that it offers a wide field of view, making focusing simpler.
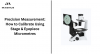
Step 3: Positioning the Slide and Sample
Make sure your specimen slide is ready and clean. Place the slide carefully on the microscope stage. Use the integrated specimen holder or stage clamps so that the slide will be stopped from sliding while being observed.
If your microscope includes a mechanical stage controller, use the knobs to move the slide.
- Left
- Right
- Forward
- Backward.
Place the area of the specimen that you would like to view in the centre of the objective lens. Proper slide placement will prevent the lens from inadvertently touching the slide. It will also speed up the process of obtaining a clear vision.
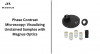
Step 4: Modifying the Source of Light
If you want clear and bright images, consider good lighting. It is highly recommended that you turn on the lamp. Also, make sure to set the brightness of the Educational microscope with LED illumination to a comfortable level. You should properly evaluate the condenser and iris diaphragm. As a result, you will ensure the light is properly focused.
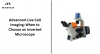
Step 5: Focusing the Microscope
Turn the coarse focus knob slowly while gazing through the eyepiece. This knob helps bring the specimen roughly into view and quickly raises and lowers the stage. To avoid the objective lens touching the slide, always proceed slowly.
Turn the fine focus knob once you can see the specimen's contour. This knob lets you make smaller adjustments that sharpen the image and highlight minute details. Until you get the picture as clean and sharp as possible, make the required changes.
If you are using a binocular head, you can adjust the interpupillary distance by gently moving the eyepiece tubes closer or farther apart. This ensures that the specimen is visible to both eyes. The diopter rings on the eyepieces can be readily adjusted if you require slightly different focus settings for each eye. If you have any doubts, you can read or watch the MLX Plus microscope review to get a clear idea of how to focus the microscope.
Step 6: Changing Magnification
Consider looking at tiny structures after examining the material at low magnification. To switch to the 40X objective, carefully rotate the nosepiece. Use just the fine focus knob to sharpen the view once the replacement lens clicks into place.
Set the 100X objective for maximum magnification. Immersion oil is needed for some 100X lenses. Before placing the lens, apply a single tiny drop of immersion oil on the slide if your model calls for it. By lowering light refraction, the oil increases clarity. Use lens paper alone to wipe the lens after use gently. At the end of the day, the Best microscope for school labs will be the best educational guide for their studies.
Step 7: Handling and Maintaining Safely
If you want to prevent scratches, you should remove the slide of the Microscope for high school biology labs carefully. Use lens paper for the lenses and use a gentle cloth to clean the stage. Avoid using sprays or abrasive cloths. To protect it from dust and insects, cover the microscope. If you preserve Durable microscopes for classroom, they will survive longer.
The Final Words
When you use the MLX Plus Microscope properly, you can clearly see details and keep the equipment safe. You get better results when you set it up correctly and pay close attention. All kids find school lab work easier and more enjoyable with these few procedures. With this MLX Plus microscope setup guide, you shall do the proper setup and make the best out of the microscope.
Faqs :-
1. How do I correctly set up the MLX Plus Microscope before starting a lab session?
To set up the MLX Plus Microscope, place it on a stable table, ensure ventilation openings are clear, connect the original power cord securely, and insert the eyepieces properly. Starting with the 10x objective lens is recommended for easy focusing, especially for beginners in school labs.
2. Why is proper slide placement important when using the MLX Plus in classroom experiments?
Correct slide placement keeps the sample centered under the objective lens and prevents accidental contact with the lens. This not only protects the optics but also ensures students get a stable, clear view of cells, tissues, or microbes during biology lab work.
3. How does adjusting the illumination help students get a clearer image on the MLX Plus?
The MLX Plus educational microscope uses LED illumination that allows brightness control. Adjusting the condenser and iris diaphragm helps concentrate the light correctly, making the specimen sharper and improving contrast for both stained and unstained slides.
4. What is the correct way to focus the MLX Plus Microscope for beginners?
Students should first use the coarse focus knob to bring the specimen roughly into view, then refine the clarity using the fine focus knob. Adjusting the interpupillary distance and diopter settings ensures both eyes see a single, sharp image—especially important in school environments where microscopes are shared.
5. Why do some MLX Plus microscope models require immersion oil at 100x magnification?
Certain 100x oil-immersion objectives need immersion oil to reduce light refraction and enhance resolution. This results in a much clearer view of very small structures such as bacteria or fine tissue details. Always clean the lens with lens paper after use to maintain optical quality.
6. How can teachers maintain the MLX Plus Microscope safely in a school laboratory?
Teachers should remove slides carefully, clean lenses only with lens paper, wipe the stage with a soft cloth, and always cover the microscope after use. These simple habits help extend the lifespan of Durable microscopes for classrooms and ensure reliable performance for daily student use.
7. Where can students learn proper handling and focusing techniques for the MLX Plus Microscope?
Students can follow classroom demonstrations, refer to the MLX Plus microscope setup guide, or watch instructional videos provided by educational platforms. Learning these basic techniques helps them confidently observe microorganisms, plant cells, and prepared slides during biology practicals.